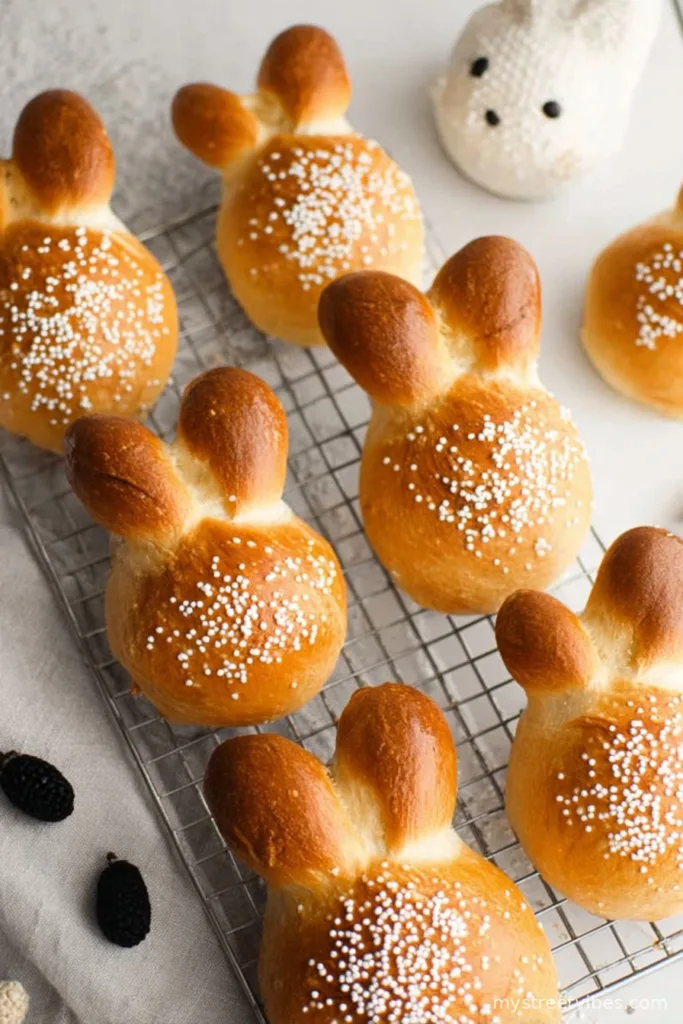
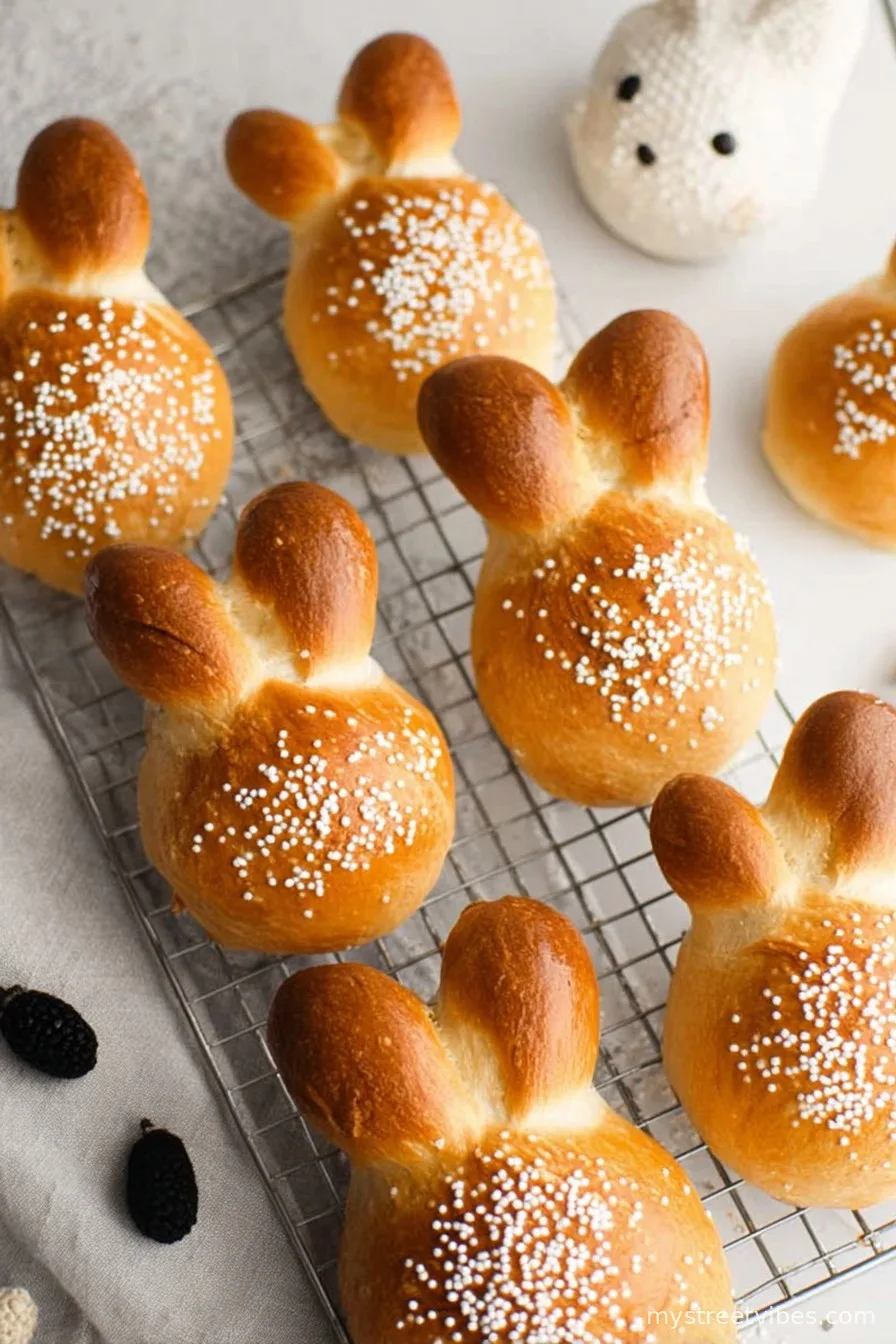
You Need to Try These Adorable Zopfhasen (Easter Bunny Rolls)
So, this might sound weird, but the smell of sweet yeasty dough baking on Easter morning always takes me back to my aunt’s tiny kitchen—crowded, loud, and everyone arguing about whose turn it was to shape the bunny ears. If you’ve never made Zopfhasen (Easter Bunny Rolls) before, you’re in for a treat. They’re a bit like a cross between a soft milk bread and a cute festive centerpiece that absolutely no one can resist pulling apart (heads first, ears second, sorry bunnies!). I’ve baked more batches of these than is probably sane, sometimes starting at midnight because my nephew requests them and, well, how do you say no?
Why I Always Come Back to This Recipe
I reach for this Zopfhasen recipe every year because, one, it’s just so darn fun to play with the dough—there’s something magical (and sometimes messy) about shaping little bunny bodies and watching them puff up while you sneak a few raisins. My family always races to eat the ones with the biggest cheeks, and there’s a bit of chaos trying to make them all uniform (we never do, and honestly, lopsided ears are cuter anyway). If I’m honest, I sometimes get too impatient and rush the rising time, but every time I take them out of the oven, the kitchen smells incredible and it’s totally worth it. Plus, they always look much more professional than I ever expect—except that one year when I accidentally gave half of them three ears… oops. They’re the perfect project for a lazy Saturday or a festive Easter brunch (kids love helping, but so do adults who claim they don’t).
Gather These Ingredients (With Some Friendly Tweaks)
- 600 g (4 cups) white bread flour (I’ve swapped in strong all-purpose flour a couple times when the store was out—still worked, just maybe a bit less chewy)
- 110 g (½ cup) caster sugar, or superfine sugar (granulated will totally do if that’s what’s on hand—it might just be a bit less smooth)
- 6 g (1 teaspoon) fine salt (table or sea, both fine, but don’t skip!)
- 14 g (4 teaspoons) instant dried yeast (tried with active dry, but the rise just took a bit longer; just don’t use brewer’s yeast, learned that one the hard way…)
- 375 ml (1 ½ cups) milk, warmed to about bath temperature (37°C/98°F) (I’ve used oat milk on a dare, but the texture goes a bit awry)
- 60 g (4 tablespoons) unsalted butter, nice and soft (once, I tried with cold butter and regretted it—room temp is best)
- 40 g (¼ cup) raisins, or sultanas—or whatever dried fruit your crew will actually eat
How To Make Zopfhasen, Step by Step
- Start by dumping the flour, sugar, salt, and yeast straight into your stand mixer bowl. (If your stand mixer bowl is in the dishwasher like mine usually is, a big mixing bowl and a wooden spoon is fine. Your arms will thank you later though.)
- Give everything a lazy stir with the dough hook attachment to just kind of mingle it all together, nothing fancy—just to combine a bit.
- Slowly pour in your warm milk as the mixer runs on low. You’re looking for everything to come together in a messy, sticky dough. Don’t panic if it looks shaggy. If you don’t have a stand mixer, just go at it with the spoon and then get your hands in there. Messy is normal here.
- This is the stage for butter therapy. Drop in a tablespoon of softened butter and let that work its way into the dough before adding the next one—repeat until all the butter’s in. It’ll look greasy and weird, but trust the process; it sorts itself out.
- Let the mixer knead the dough for a solid 15–20 minutes on medium speed; it’ll get smoother and sort of elastic. If making by hand, knead, and knead some more—think of it as an upper-body workout (with snacks at the end). You’re done when it stretches like a good rubber band and bounces right back when poked. (A little stickiness is fine, but it shouldn’t be super wet.)
- Swirl a tiny bit of oil around a big bowl, just so nothing sticks. (Or slather with butter. Honestly, both work. I just use whichever is handy.)
- Plonk the dough in, then cover with a tea towel. Dish towel works too—the only thing I’d warn, don’t use one that smells like last night’s curry. (Learned that last Easter—regret!)
- Find a cozy warm nook in your kitchen for the bowl. Let it hang out for at least an hour (I check around 75 mins if my kitchen is cold) until it’s doubled in size. No need to measure, just eyeball it. If in doubt, walk away and do something else.
- Once your dough’s big and puffed up, punch it down—yep, just like it sounds, give it a gentle, satisfying thwack to get rid of the air.
- Knead it gently a few more times, then scatter in the raisins (or sultanas, or honestly whatever) and work them in. I like smushing them in with my hands; it feels rustic.
- Time to portion! Pat your dough out into a fat, loggy snake.
- Cut off chunks for each bunny: you’ll want three parts—a little 20g bit for the ears, a 30g ball for the head, and a 50g chunk for the body. You should squeak out about 12 bunnies, more if you make them tiny. (I use my kitchen scale, but honestly, after the first few bunnies, I just guess.)
- Roll each piece into a ball and set aside. Tiny dough balls are kind of addictive to roll, don’t get carried away and eat them raw though—ask me how I know.
- Let’s give these bunnies some character. Press the head ball firmly onto the bigger body ball. Don’t be shy, they need to stick together!
- The ears are fun. Take your 20g piece and smush it into an oval. Make a slice down the middle but stop before you cut it in half completely—maybe go three-quarters of the way, like you’re giving it a parted haircut. Fan out the ears a bit.
- Casually drape a piece of cling film over your bunny creations—don’t smoosh them, just enough to shield from drafts. Let them rest somewhere warm (near but not ON the preheating oven is great) for about 20 minutes. They’ll puff up a little; mine always look cuter after this step.
- Once you’ve given them that final chill-out and filled up one baking tray (usually about 6 per tray here), get ready for the next phase.
- Crank your oven up to 220°C/428°F. (Don’t use convection or fan if you can help it—these like regular baking best.)
- For a lovely golden finish, whisk together one egg and a dash of milk. This is your bunny spa treatment. Brush it gently over each bunny, getting into the folds and over the ears.
- Stick a raisin (or whatever you fancy) on each head for an eye (some years mine are winking—just go with it).
- Generously sprinkle pearl sugar over the little bunny bodies. Kids love doing this (and making a mess). If you don’t have pearl sugar, big sugar crystals work, or skip it—still tasty.
- Pop the tray into your hot oven for 15–20 minutes. Keep a close eye from about 10 minutes in—every oven runs its own race and nobody wants charred bunnies. If they’re getting too dark too fast, loosely tent with foil, and keep going. You’re aiming for lovely golden brown. If you’re a thermometer sort (I forget half the time), cooked bunnies should be around 85°C/185°F inside.
- Carefully transfer your bunnies to a wire rack—use a spatula if they’re too soft to move. Let ’em cool, at least a little, before devouring. (Though I’ll admit, hot and fresh is unbeatable.)
A Few Notes From My Kitchen to Yours
- Yeast seems fussy but isn’t—if your dough doesn’t rise, check your yeast date. I once used a packet dated “2017.” That was flat-out disappointing.
- If you forget the egg wash or run out of eggs, skip it. Bunnies won’t be glossy, but they’ll still taste great.
- Dough too sticky? Flour your hands for shaping. Won’t fix everything, but it helps.
Some Fun Variations I’ve Tried (and a Flop)
- Chocolate chips instead of raisins—big hit with my niece (but they’ll melt and ooze; not bad, just messier!).
- I once colored the dough with beet juice for pink bunnies. Not as cute as I’d hoped, but still edible.
- Orange zest in the dough—delicious, especially with tea!

Equipment (But Don’t Sweat It)
- Stand mixer really makes kneading easy, but hands do a fine job. I’ve done the whole batch old-school, and just needed an extra coffee afterwards.
- Kitchen scale helps if you want bunnies all the same size. Sometimes I just judge by eye, and nobody’s ever complained, so…
- No wire rack? Cool the buns on the (off) oven rack or a wooden board.
How to Store These Buns (But They Never Last Here)
Officially, Zopfhasen keep best in an airtight container for 2 days at room temp. In reality, mine always vanish by the next morning (if you hide a few, you’ll appreciate how good they are a day later, kind of like they’ve rested). You can freeze them, just wrap up well—defrost in the oven or let thaw, then warm up a bit to revive ’em.
How We Serve Zopfhasen
Usually with a bit of homemade jam and butter; sometimes I just eat them plain, especially the ears. My little brother prefers dunking in cocoa, which is actually more delicious than I’d admit out loud. At Easter, we sometimes tie little ribbons around their necks before serving—which is “adorable overload,” as my mom says.
Things I Learned the Hard Way (Pro Tips)
- Don’t cut the ears all the way through. They’ll fall off and you’ll have “Easter party bunnies”—not ideal.
- Rushing the rise makes dense buns. I did this once to save time and regretted it. Be patient!
- Shape fast if the kitchen’s warm; dough gets stickier and tricky to handle after a long sit.
FAQs (Real Questions, Real Answers)
- Do I absolutely need a stand mixer?
Not at all! Sometimes I just get in there with my hands—bit more effort, but totally works. Just knead a bit longer. - What if my buns don’t rise?
Old yeast or a chilly kitchen are the usual culprits. Let the dough hang out longer, it always rises eventually unless the yeast is truly past it’s best. - Can I shape them the night before?
You can, but let them do their second rise in the fridge overnight. They’ll just need time to come to room temp before baking in the morning. - Help, my raisins fall out everywhere!
Happens to the best of us! Try tucking them deep in the dough, but honestly, a few escapees add character. - My bunnies look all wonky. What gives?
It’s called ‘rustic!’ Seriously though, they’re always a bit haphazard, that’s the charm. Eat the ugliest ones first (baker’s treat!).
Alright, that’s the whole round-up. Zopfhasen: festive, fluffy, a little silly, and always, always worth making. Happy baking—may your bunnies be just the right amount of wonky!