If you’ve never made Key Lime Cookies before, oh wow, you’re in for a treat (and probably a bit of a mess on your counter, let’s be honest). I first baked these after a family trip to Florida—where every second shop seems to sell something with key limes in it, even soap! The zingy flavor brings me right back. Also, once I ran out of limes and tried lemons instead… but, nope, stick with the limes if you possibly can. Or do as my neighbour Jenny does and sneak some into your morning coffee—I mean, I don’t get it, but to each their own.

Why You’ll Love This (Trust Me)
I bake these whenever I want something that’s cheerful and a little sassy—my sister says the cookies are basically sunshine in edible form. My kids go bonkers for them (always with sticky hands), though sometimes I find myself scarfing down the last cookie with zero guilt after everyone else is in bed. If you’ve had trouble getting cookies to bake just right, I relate; I once burnt a batch because I left the dough chilling too long and then forgot them in the oven while binging a British detective show. But one of the fun things here is that the tartness covers a multitude of sins. Tangy, sweet, a bit soft in the middle—what’s not to love?
The No-Frills Ingredients (plus a couple wildcards)
- 1 cup (about 225 g) unsalted butter, softened (I’ve used salted before—just reduce the extra salt a smidge, tastes fine)
- 1 cup granulated sugar (brown sugar gives a slightly deeper taste, actually not bad in a pinch)
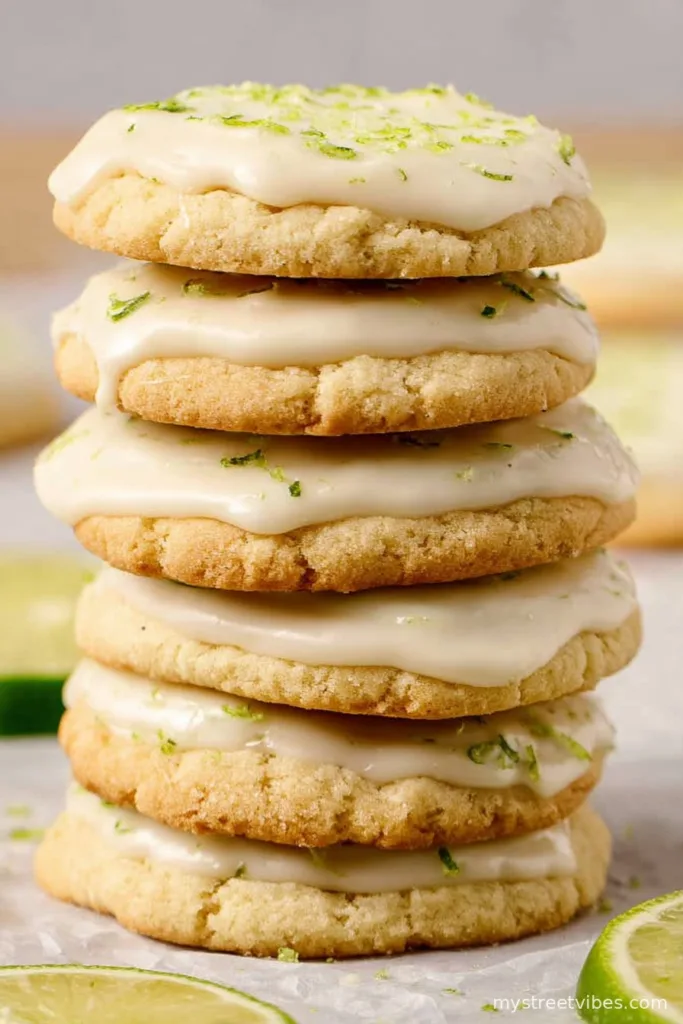
- Zest of 3 key limes (or regular limes, if you’re nowhere near the Keys – my grocery store rarely has real key limes, and honestly, life’s too short to stress about that)
- 3 tbsp freshly squeezed key lime juice (bottled will work, just give the dough an extra sniff to make sure it smells limey enough)
- 2 large eggs
- 2 1/2 cups all-purpose flour (once I ran out and snuck in half a cup of cake flour – not much difference, IMHO)
- 1/2 tsp baking soda
- 1/2 tsp baking powder
- 1/4 tsp salt (my grandmother swore by sea salt, but table salt seems fine, too!)
- 1/2 cup powdered sugar for rolling (optional, but looks very posh, so why not?)
Let’s Make Some Key Lime Cookies!
- Fire up your oven to 350°F (about 180°C). If you forget and turn it to broil—been there—just start over. Line a baking tray with parchment, because scraping sticky cookies off metal is my idea of a good time (kidding!)
- Grab a big bowl. Cream the butter and sugar until it’s, let’s say, fluffy-ish. If your butter isn’t soft enough, microwave it for just a few seconds—I’ve forgotten and made a puddle, so maybe keep an eye on it. Beat in the lime zest, juice, and eggs until it sort of looks (and smells) tropical.
- Whisk together the flour, baking soda, baking powder, and salt in another bowl. I’ve dumped it straight in before; it works, but you might get a stray salty bite (ask my youngest—he makes a face).
- Tip the dry stuff into the wet, stir gently—don’t overmix, or they get tough (learned that the hard way). It’ll be soft and a little sticky; sometimes I chill the dough for 15 minutes if it’s too gloopy, but I also skip chilling on school nights and they still work.
- Scoop out balls (about a tablespoon size). I plop them right onto the tray, but rolling them in powdered sugar first is fun and stops them sticking, plus makes you look like someone who has her life together. Space them out—trust me, these babies grow.
- Bake 10–12 minutes. Watch for just-barely golden edges. If you overdo it, they still taste alright but lose the soft chewy charm. Let them cool a few minutes on the tray—hot cookies burn fingers fast. Then move to a rack, unless, like me, you eat one straight away just to “test” it.

My Real-World Notes
- If your dough’s too sticky to scoop, pop it in the fridge for a bit; but don’t leave it overnight, or it goes weird on you.
- Powdered sugar is technically optional, but wow, it looks fancy.
- Lime zest is the soul of these cookies—don’t skip it, unless you want sadness. (That said, zesting as many tiny limes as recipe calls for? A workout for your wrists.)
My Variations (The Good, the Bad, and the Odd)
- I tossed in a dash of coconut flakes once—honestly delicious, even if it looked like I’d dropped the cookies in confetti.
- Tried drizzling white chocolate on top. a bit too sweet for my taste, but my friend Simon loved it.
- I once used orange zest (out of limes, emergencies happen)—the cookies were okay but kind of like citrus muffins, not really wow.

Equipment (Or Lack Thereof)
- A hand mixer is great here, but I’ve absolutely mashed the butter and sugar with a fork, if you’re in a student kitchen or your mixer’s on strike.
- Parchment paper is nice, but I’ve also baked right on the tray—just add a bit more flour to stop sticking, and maybe resign yourself to a little more cleanup.
Storing Your Key Lime Cookies
Pop them in an airtight tin or a zip-top bag; they’ll keep for up to four days, apparently. Though, honestly, in my house they last twelve hours—if that. They’re even pretty good straight from the freezer with coffee (don’t ask how I know).
How I Like to Serve ‘Em
Stacked high on a cake stand with a cheeky wedge of lime in the middle—very movie night chic. Or, sandwiched around a dollop of whipped cream if I’m feeling extra. My mum likes to serve hers with cold sweet tea, because—well, she’s a bit Southern, bless her.
Pro Tips from Someone Who’s Messed Up More Than Once
- Don’t skip the chilling if it’s hot out—otherwise, cookies melt into each other (I learnt this one July, ruined the whole first tray).
- Resist the urge to bake until they’re completely golden on top—they firm up as they cool. I once forgot and ended up with lime-flavored hockey pucks.
- Actually, I find it works better if you whisk eggs in a separate cup before adding to dough—less streaky, but I admit I only do this when company’s coming.
Alright, Some Real Questions I’ve Gotten
- Can I use bottled lime juice? Yep. It’s definitely not as zingy as fresh, but if it’s what you’ve got, you’re golden. Sometimes I boost the zest to balance it out.
- What if I only have regular limes? Absolutely use them! Key limes are great, but regular limes are everywhere (and your fingers won’t cramp up zesting them).
- Help! My cookies spread into one giant blob! Ha! I’ve done this. Usually means your dough was too warm—pop it in the fridge for 15 minutes and try again.
- Can I freeze the dough? Sure thing. Form balls, freeze on a tray, then toss into a bag—bake from frozen; just tack on an extra minute or two. Actually, I think they bake up even better this way.
- How do I know they’re done? Edges should look just golden, centers a bit pale. If unsure, I poke one. If it springs back, you’re good.
So, there you have it—my somewhat rambling, definitely lime-scented path to Key Lime Cookie bliss. If you try a twist or make a discovery, tell me! (Seriously, I need new ideas; my youngest says next time we should add sprinkles.) Happy baking!
Ingredients
- 1 cup (about 225 g) unsalted butter, softened (I’ve used salted before—just reduce the extra salt a smidge, tastes fine)
- 1 cup granulated sugar (brown sugar gives a slightly deeper taste, actually not bad in a pinch)
- Zest of 3 key limes (or regular limes, if you’re nowhere near the Keys – my grocery store rarely has real key limes, and honestly, life’s too short to stress about that)
- 3 tbsp freshly squeezed key lime juice (bottled will work, just give the dough an extra sniff to make sure it smells limey enough)
- 2 large eggs
- 2 1/2 cups all-purpose flour (once I ran out and snuck in half a cup of cake flour – not much difference, IMHO)
- 1/2 tsp baking soda
- 1/2 tsp baking powder
- 1/4 tsp salt (my grandmother swore by sea salt, but table salt seems fine, too!)
- 1/2 cup powdered sugar for rolling (optional, but looks very posh, so why not?)
Instructions
-
1Fire up your oven to 350°F (about 180°C). If you forget and turn it to broil—been there—just start over. Line a baking tray with parchment, because scraping sticky cookies off metal is my idea of a good time (kidding!)
-
2Grab a big bowl. Cream the butter and sugar until it’s, let’s say, fluffy-ish. If your butter isn’t soft enough, microwave it for just a few seconds—I’ve forgotten and made a puddle, so maybe keep an eye on it. Beat in the lime zest, juice, and eggs until it sort of looks (and smells) tropical.
-
3Whisk together the flour, baking soda, baking powder, and salt in another bowl. I’ve dumped it straight in before; it works, but you might get a stray salty bite (ask my youngest—he makes a face).
-
4Tip the dry stuff into the wet, stir gently—don’t overmix, or they get tough (learned that the hard way). It’ll be soft and a little sticky; sometimes I chill the dough for 15 minutes if it’s too gloopy, but I also skip chilling on school nights and they still work.
-
5Scoop out balls (about a tablespoon size). I plop them right onto the tray, but rolling them in powdered sugar first is fun and stops them sticking, plus makes you look like someone who has her life together. Space them out—trust me, these babies grow.
-
6Bake 10–12 minutes. Watch for just-barely golden edges. If you overdo it, they still taste alright but lose the soft chewy charm. Let them cool a few minutes on the tray—hot cookies burn fingers fast. Then move to a rack, unless, like me, you eat one straight away just to “test” it.
CLICK FOR NUTRITION INFO
↑
Approximate Information for One Serving
Serving Size:
1 serving
Calories:
150 caloriescal
Protein:
2gg
Fat:
7gg
Saturated Fat:
0g
Trans Fat:
0g
Cholesterol:
0mg
Sodium:
0mg
Potassium:
0mg
Total Carbs:
20gg
Fiber:
0g
Sugar:
0g
Net Carbs:
0g
Vitamin A:
0
Vitamin C:
0mg
Calcium:
0mg
Iron:
0mg
Nutrition Disclaimers
Number of total servings shown is approximate. Actual number of servings will depend on your preferred portion sizes.
Nutritional values shown are general guidelines and reflect information for 1 serving using the ingredients listed, not including any optional ingredients. Actual macros may vary slightly depending on specific brands and types of ingredients used.
To determine the weight of one serving, prepare the recipe as instructed. Weigh the finished recipe, then divide the weight of the finished recipe (not including the weight of the container the food is in) by the desired number of servings. Result will be the weight of one serving.
Did you make this recipe?
Please consider Pinning it!