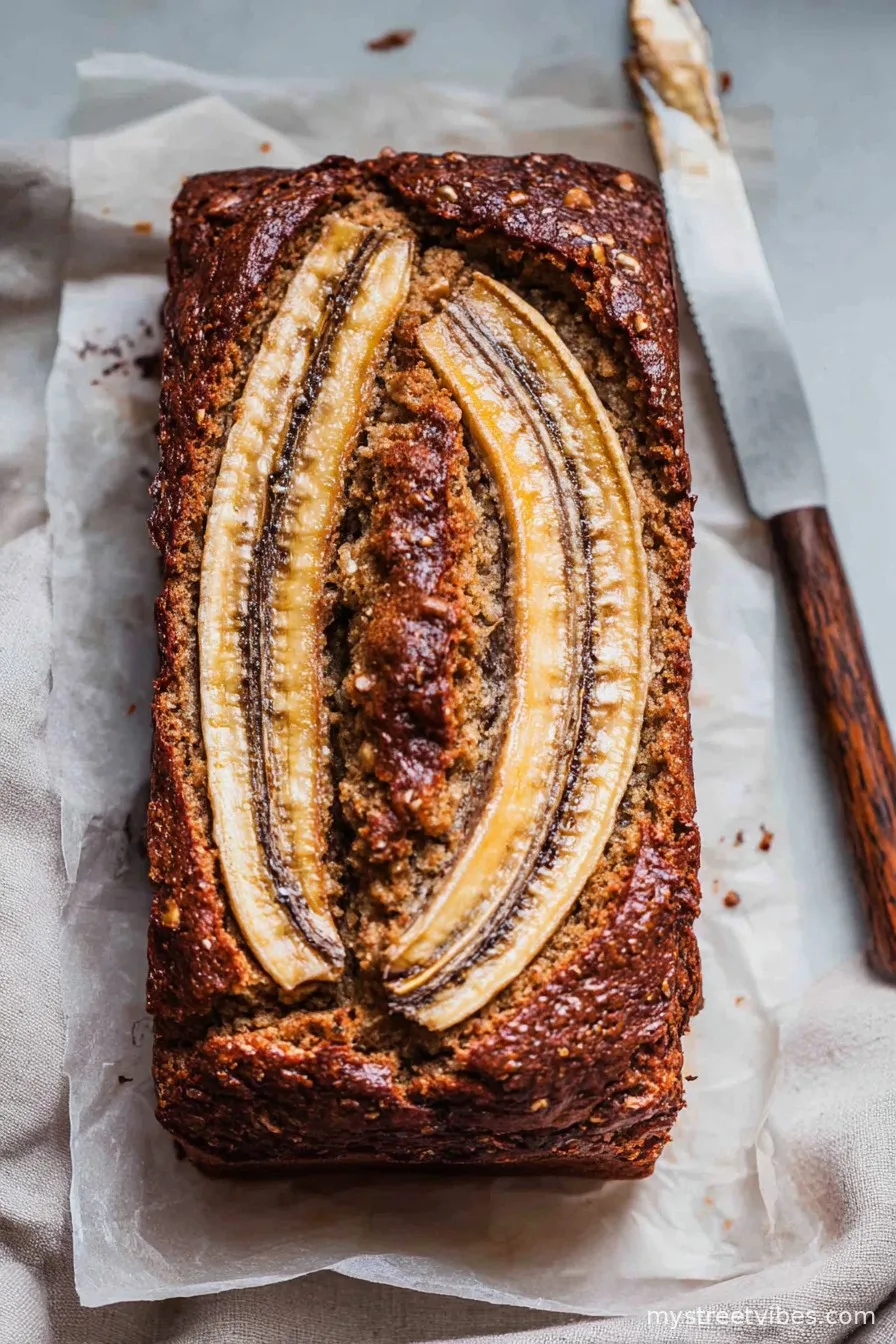
A Little Chat About Banana Bread (and why I can’t resist)
So, here’s the thing: I probably make banana bread more often than I water my plants (and those poor guys are dusty). The Best Vegan Banana Bread is no exception. I remember, ages ago, when I tried to sneak it into my dad’s lunchbox—he had no idea there were zero eggs or butter snuck in there. He just said, “Did you put chocolate in this?” I hadn’t, but honestly, that’s an idea for next time. Anyway, this recipe has become such a weekend thing that I start to miss it if I go two weeks without.
Why You’ll Love This Banana Bread (or, why my family hoards it)
I make this whenever I spot sad bananas in the fruit bowl (the spottier, the better, right?). My family goes mad for this because it’s super soft and perfectly sweet—a real hands-grab-for-seconds situation. And, you know how some vegan bakes come out a bit… rubbery? Not here. It’s basically foolproof, unless you forget the baking soda. I did that once—banana brick. Now, I triple check.
What You’ll Need (ingredients and a bit of poetic license)
- 3 overripe bananas (the kind with more spots than banana left—trust me)
- 1/2 cup light brown sugar (sub with coconut sugar if that’s what’s in your cupboard; my nan swears by dark muscovado, but it’s a bit rich for me)
- 1/3 cup neutral oil (sunflower, canola, or even light olive oil—once I used melted coconut oil, and it made it taste like a holiday)
- 1/4 cup plant milk (almond or oat works, but honestly, even water in a pinch is fine)
- 1 tsp vanilla extract (I’m liberal, sometimes it’s more like a glug than a teaspoon)
- 1 1/2 cups plain flour (all-purpose; sometimes I’ll sneak in half wholewheat just to feel virtuous)
- 1 tsp baking soda (don’t mix this up with baking powder, or it’s just… sad)
- 1/2 tsp salt (skip if you’re using salted nuts later)
- 1/2 tsp cinnamon (if you remember—my partner claims it makes it taste like autumn)
- 1/2 cup chopped nuts (walnuts are classic, pecans if I’m feeling flashy, or leave them out for no-nut loaf)
- Optional: A small handful of chocolate chips (sometimes more by ‘accident’)
Let’s Make It (directions, with zero pretence)
- Preheat your oven to 350°F (about 180°C). If you forget and only notice halfway through, it’s fine; just stick your loaf in when it’s up to temp, no drama.
- Grab a loaf pan and either line it with baking paper or do what I do and just slap in a bit of oil with a pastry brush (or your fingers, if you’re like me and always lose the brush).
- Mash the bananas in a big bowl. Use a fork—I tried a potato masher once, but it got stuck. You want it squishy, not a smoothie.
- Dump in the sugar, oil, plant milk, and vanilla. Stir it up. This is where I usually sneak a tiny taste; don’t tell anyone.
- Toss the flour, baking soda, salt, and cinnamon right on top. I don’t bother mixing the dry in a separate bowl because… honestly, why?
- Gently fold everything together–don’t overmix, or your loaf’s gonna be tough. Bits of flour left? No worries, they’ll vanish in the oven.
- Stir in your nuts (and chocolate chips, if you’re going wild), but don’t overthink it.
- Scoop the batter into your pan and level it out. Top with a sliced banana or a few more nuts if you’re feeling fancy (I only bother for guests).
- Bake for 45-55 minutes. But, ovens have their own personalities, so start checking at 45. A skewer should come out with a crumb or two—not raw batter. If you forget and leave it a bit long, it usually just means crunchier edges, which I secretly love.
- Let it cool in the tin for about 10 minutes. Then, run a blunt knife around the edge and tip it out (here’s where I often burn my hand in my impatience—be smarter than me).
My Real-Life Notes (don’t learn the hard way)
- The riper the bananas, the less sugar you need. Sometimes I only use 1/3 cup if the bananas are basically syrup.
- Once, I swapped in applesauce for banana when I was short—let’s just say, banana bread without banana is… just bread.
- If it sinks in the middle, it probably needed another 5 min in the oven. But hey, who’s judging?
Stuff I’ve Tried—some great, some not so much
I’ve tried swirling in peanut butter—delicious! Swapping all-purpose flour for almond flour… not so much, it turned out more like banana mush; Live and learn. Occasionally, I toss a handful of dried cranberries in for a “holiday” version, which my mum says is “surprisingly nice.”

What About Equipment? (No stand mixer? No biggie)
Frankly, I mix everything in one big bowl with a fork and a wooden spoon. If you don’t have a loaf pan, you can pour this into a muffin tin—it’ll just be done faster (about 22 mins per tray, more or less). No parchment paper? Just grease the pan really well; maybe dust with flour if you’re feeling fancy.
Storing the Good Stuff (if it lasts)
Technically, you can wrap it up and keep it on your counter for 2-3 days, but honestly, in my house it never lasts more than a day. If the impossible happens and there’s leftovers, fridge is fine—just give it a quick toast in the morning (amazing with coffee).
Serving: How I Like Mine
Best eaten warm, thick-sliced with vegan butter melting in (sometimes a bit of peanut butter too if I’m feeling rebellious). For my son, it’s got to be with a puddle of oat milk on the side (never understood that habit, but hey, family quirks).
Things I Wish I’d Known (aka Avoid My Mistakes)
- Don’t rush letting it cool. I once tried slicing right out of the oven and ended up with banana…mash. Tasted fine; not pretty.
- Overripe bananas are your friend. Underripe ones give you bland, firm loaf—never good.
- Bake it low and slow. If you crank the heat, it’ll brown outside and stay gummy inside. Ask me how I know.
Quick FAQs (because friends actually ask these things)
Can I make it gluten free?
Yeah, kinda—use a 1:1 gluten free flour, but it can be a bit crumbly. A tip? Add a spoonful of ground flax if you have it.
Can I freeze it?
Absolutely! Slice it up first and freeze in wraps. Pull out as needed, and toast. Honestly, though, mine rarely sees the freezer.
My bananas aren’t ripe enough. Fix?
Bake them (skins on!) at 300°F for about 15 minutes. Makes them all mushy and sweet. Or just pop them in the microwave for 30 seconds if you’re in a rush.
It’s a bit dense. What did I do?
Could be overmixing the batter, or too little baking soda. Or maybe it’s just one of those mysterious kitchen days—happens to the best of us!
I guess the real magic is just enjoying the process—even if your kitchen ends up looking like a flour-covered war zone (I’ve come to accept it as part of the experience!). Next time, maybe I’ll try that chocolate swirl idea. Or maybe not. We’ll see!
Ingredients
- 3 large ripe bananas, mashed
- 1/2 cup coconut oil, melted
- 3/4 cup organic cane sugar
- 1/4 cup unsweetened almond milk
- 1 teaspoon vanilla extract
- 1 3/4 cups all-purpose flour
- 1 teaspoon baking soda
- 1/2 teaspoon salt
- 1/2 teaspoon ground cinnamon
- 1/2 cup chopped walnuts (optional)
Instructions
-
1Preheat the oven to 350°F (175°C). Grease a 9×5-inch loaf pan or line it with parchment paper.
-
2In a large bowl, mash the ripe bananas until smooth. Whisk in the melted coconut oil, cane sugar, almond milk, and vanilla extract until well combined.
-
3In a separate bowl, whisk together the flour, baking soda, salt, and cinnamon. Gradually add the dry ingredients to the wet mixture and stir until just combined. Fold in the chopped walnuts if using.
-
4Pour the batter into the prepared loaf pan and smooth the top. Bake for 50-55 minutes, or until a toothpick inserted into the center comes out clean.
-
5Let the bread cool in the pan for 10 minutes, then transfer to a wire rack to cool completely before slicing and serving.
CLICK FOR NUTRITION INFO
↑
Approximate Information for One Serving
Serving Size:
1 serving
Calories:
210 caloriescal
Protein:
3gg
Fat:
7gg
Saturated Fat:
0g
Trans Fat:
0g
Cholesterol:
0mg
Sodium:
0mg
Potassium:
0mg
Total Carbs:
36gg
Fiber:
0g
Sugar:
0g
Net Carbs:
0g
Vitamin A:
0
Vitamin C:
0mg
Calcium:
0mg
Iron:
0mg
Nutrition Disclaimers
Number of total servings shown is approximate. Actual number of servings will depend on your preferred portion sizes.
Nutritional values shown are general guidelines and reflect information for 1 serving using the ingredients listed, not including any optional ingredients. Actual macros may vary slightly depending on specific brands and types of ingredients used.
To determine the weight of one serving, prepare the recipe as instructed. Weigh the finished recipe, then divide the weight of the finished recipe (not including the weight of the container the food is in) by the desired number of servings. Result will be the weight of one serving.
Did you make this recipe?
Please consider Pinning it!!